Showing posts with label Craft. Show all posts

Thursday, November 20, 2014

In the Kitchen with Caroline Abbott

In the Kitchen with Caroline Abbott

Supplies
clay
plastic knife (get a parent to help)

Get these colors of clay for this project


First we are going to start with orange. roll it into a ball


And your done! We will do more food activities with the other colors later.

Saturday, January 25, 2014

Valentines Craft!

 I thought it would be fun to use some of my duct tape from Christmas and make a couple of things. My step mom and I went through my duct tape book and found out how jazz up some old picture frames and that got my mind thinking.

Supplies

  • duct tape
  • scissors
  • a picture of your doll
  • a paper bag or cardboard (optional)
  • clear plastic wrap (optional)


  1.  make a square of duct tape 


2. add plastic wrap on the back of the duct tape (optional)

 3. Take a picture out of a magazine or print on and stick it on top of the plastic wrap
 4. put duct tape over it to secure it
 5. add cardboard or a piece of a paper bag over the picture to make it stiff so it won't be flimsy
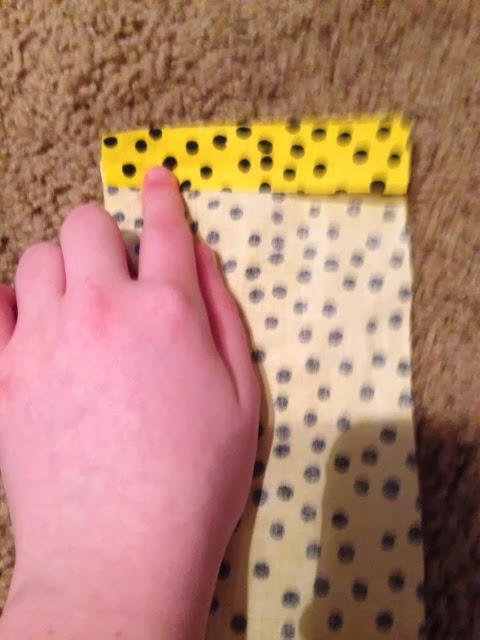
6. fold over the duct tape that makes up the frame
this is what it should look like
The final product! Sorry about the glare. 

I hope you had fun with this! If you recreated this project send us pictures on Instagram with the #luvofdollscraft or email us pics with the subject LuvOfDolls craft.

Luv Ya!
Sissy

Monday, December 9, 2013

Happy Dollidays Day 2

Sorry I am posting this so late in the day I had tons and tons of homework and I am still not done. :(  

So today we are going to make chain links that you can hang up for decoration!
 Supplies!
1. cut your paper into little strips
 2. staple them in a circle
 3. staple them together
 I made 4 strands of 3 for the dance Christmas party on Saturday
 Paige went to dance today to help Ms. Gracie get ready for the party


I also made a red and green one that is hanging on the wall in the background.

I will try to post a Happy Dollidays craft everyday until Sunday but I may have to skip a day or two because of the amoun tof homework that I have each a day. :( I do post on Instagram so you can find exclusive pictures and updates on Instagram. Search Officialluvofdolls.  

Luv Ya!
Sissy :)


Saturday, November 9, 2013

DIY Home Decor Day 3

Today's craft is quit simple but it made my room look really cute. I am going to show you how to make a table!

 1 gather scissors, 2 ribbon spools, a toilet paper roll, and scrapbook paper
 2 trace a circle on the plain side of the scrapbook paper the size of a spool
 3 cut it out
 4 glue it to the top of your ribbon spool
5 add duct tape to the bottom of the spool that has paper on the other side
 6 stick the toilet paper roll to the duct tape 
7 add more duct tape and add a small piece of cardboard to the bottom to make it stand up


This wasn't very exciting I know but it is easy and can tie a room together!

Luv Ya!
Sissy

Tuesday, November 5, 2013

DIY Home Decor Day 2!

How to make curtains!

Here is a some what easy way to make curtains sorry if my instructions are confusing!

 1. cut fabric to the size you would like
 2. fold top over
3. mark where you are going to sew or glue
 4 sew or glue the line leaving it opened at the top
here is what it should look like
 5. stick a straw or drink stir in the opening at the top
6. cut down the middle to make two curtains


Luv Ya!
Sissy

Monday, November 4, 2013

DIY Home Decor day 1!


How to make Coasters 

Here is a fun and easy craft to kick off an awesome week! Today's craft is on how to make coasters for your doll's drinks.


 1. find plastic bottle caps
 2. use scrapbook paper and trace a circle the size of your bottle cap
 3. cut out the circle
 4. make sure you paper circle fits in your bottle cap
5. glue in your circle
 Here are 3 different ones that I have made: one with glitter, ribbon, and paper!
BEAUTIFUL!!!!

If you recreate this craft please send us pictures at luvofdolls@yahoo.com and in the subject put Day 1!

Luv Ya!
Sissy

Sunday, October 27, 2013

Saturday, September 7, 2013

Back to school! How to make a doll folder!

Supplies! 
Duct tape
scissors
the keep and return labels ( at the end of this post)


  1.  cut four strips the same length (I prefer about 3 and a half inches)

 2. fold 2 together and try to make them more even than I did :)
 3. take the 2 sets that you folded together and lay them on top of each other

 just like this. Now take an other 4 pieces and repeat steps 1 and 2 for the pocket
4. now lay the 2 out flat on top of a piece of duct tape, where the duct tape is in the middle of the 2
5. make sure that the tape isn't showing through like in the picture below
 6. printout these labels or make your own for the pockets inside.
 Here is how mine turned out. I made my labels with my typewriter.
 The inside.

Here is Caroline with the folder.


Hope you love it!

LUV YA!!!
Sissy